
A big kick, a wide supersaw, and a soaring lead line will get you something that sounds like uplifting trance for about eight bars. What actually holds a track together — what makes a listener feel the drop rather than just hear it — is the relationship between the chords underneath, the melody riding on top, and the way the arrangement builds toward and away from that moment. That relationship is where most attempts at the genre fall apart, and it’s also where Cubase, used deliberately rather than defaulted through, can do a lot of the heavy lifting when you’re learning how to make uplifting trance with Cubase.
This is a walkthrough of that process: from an initial idea through to a finished arrangement, focused on the musical and production decisions that actually shape the outcome rather than a tour of menus you already know how to open.
What Makes Uplifting Trance Work?
Uplifting trance runs on emotional contrast more than any single sonic ingredient. The chord progressions tend to move through suspensions and resolutions that create a sense of yearning or release — a suspended fourth resolving to a major third, a minor chord giving way to its relative major — and that harmonic movement is doing most of the emotional work, not the choice of synth playing it. A melody that sits well against that harmony, built from a small number of strong intervallic ideas rather than a constant stream of notes, is what makes the track memorable after the first listen rather than just impressive in the moment.
Underneath that, the kick and bass have to establish a driving, physical foundation that stays consistent whether the arrangement is sparse or fully loaded, because a track that loses its low-end weight the moment more elements enter sounds thin exactly when it needs to sound biggest. And the arrangement as a whole has to create a clear sense of forward motion — tension building toward a point, release at that point, and enough variation across repeated sections that the track doesn’t feel like a loop with a fade in and out. None of these elements does much on its own. A great chord progression under a flat arrangement falls flat; a huge drop with no breakdown to set it up feels arbitrary. The genre works when harmony, melody, arrangement, and energy are all pulling in the same direction at the same time, and that’s the thing to keep in mind before opening Cubase at all.
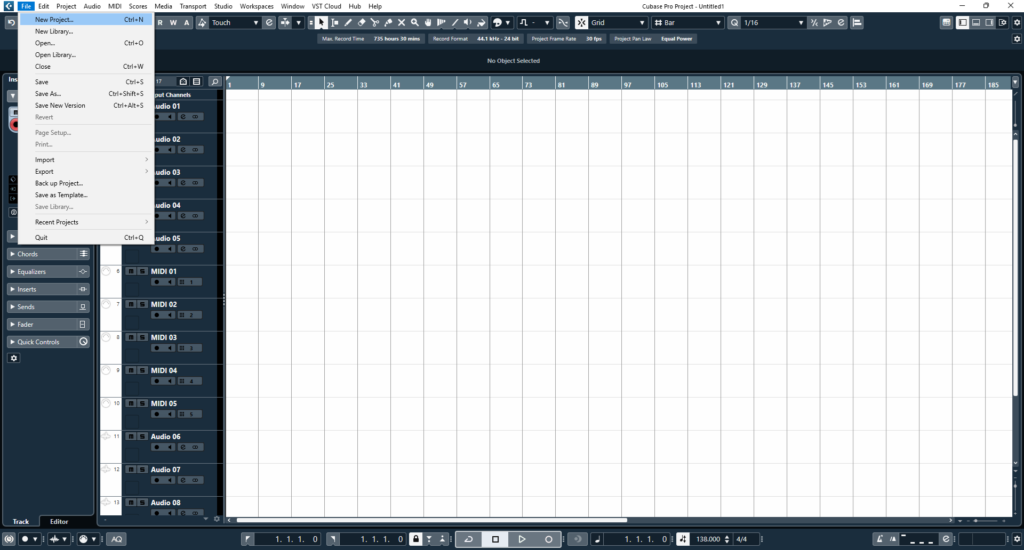
Start a New Cubase Project
Uplifting trance generally sits somewhere between 132 and 140 BPM, though the exact tempo says less about genre purity and more about how driving or spacious you want the track to feel — 132 leaves a bit more room in the groove, while 138–140 pushes harder and suits more energetic, festival-leaning arrangements. Pick based on how the kick and bass pattern feels when you loop it, not from a rule. When learning how to make uplifting trance with Cubase, most common setting for beginners is to start a trance track at 138 BPM.
Key choice matters more than producers often treat it. A minor key with a strong relative major push in the breakdown is the classic uplifting trance move because it sets up exactly the kind of harmonic lift the genre depends on, but there’s no requirement to default to A minor or any other “trance key” out of habit — pick a key based on where you want the melody to sit vocally or instrumentally, and build from there.
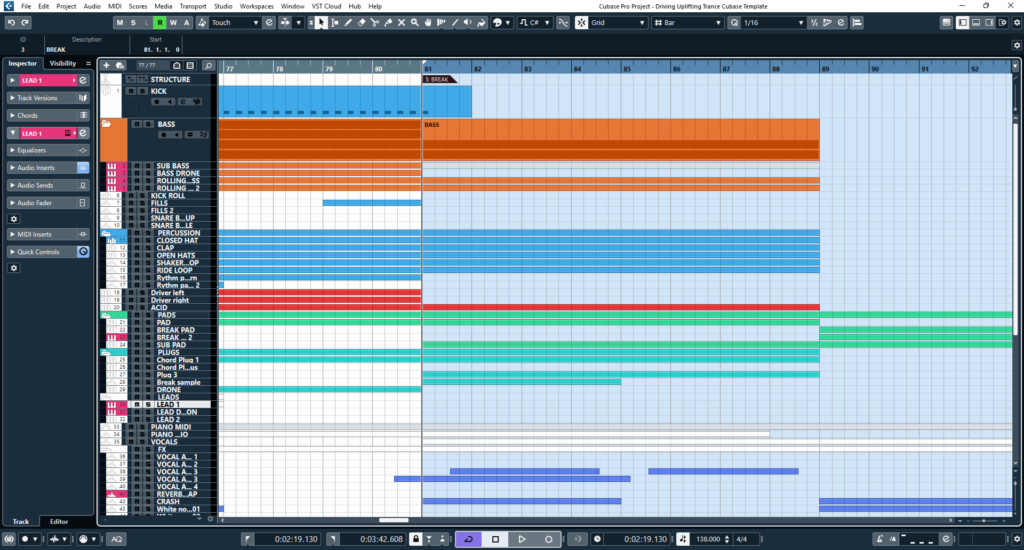
For the project itself, it’s worth setting up a folder structure before you start writing rather than adding it later: a folder for drums, one for bass, one for chords and pads, one for lead and melodic elements, and one for FX and transition material. Group channels routed from those folders make bus processing and overall balance far easier to manage once the arrangement fills out, and having clean folder organisation from the start makes later Arranger Track experiments far less painful. Markers are worth placing early too, even as rough placeholders — Intro, Breakdown, Build, Drop — since renaming and moving them as the arrangement develops is much faster than retrofitting structure later.
Build the Kick and Bass Foundation
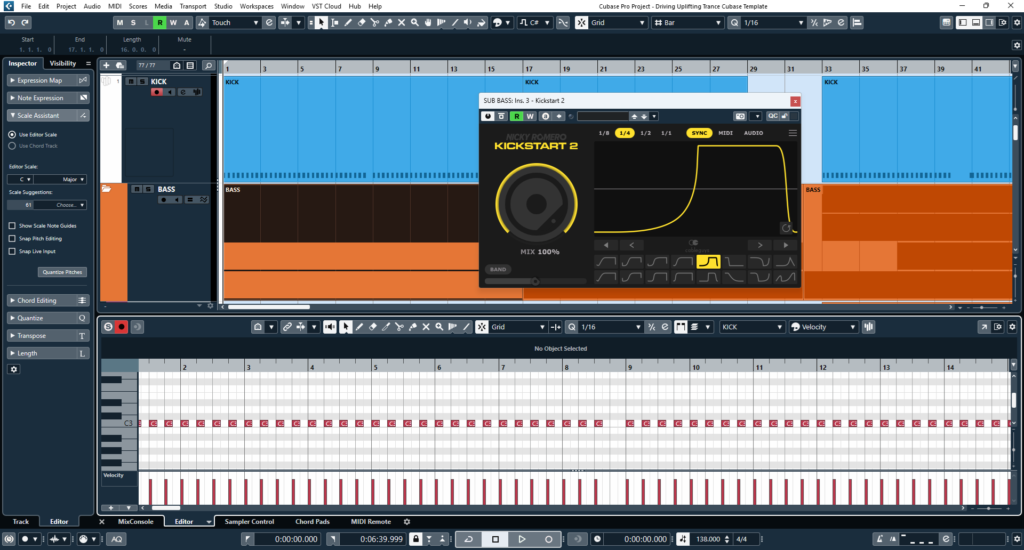
The kick and bass relationship is the part of an uplifting trance track most likely to quietly ruin an otherwise strong idea, because problems here are audible in every section, not just the drop. Start with the kick’s tonal character and length before worrying about loudness — a kick with a short, controlled tail leaves room for the bass to establish its own rhythmic identity underneath, while one that rings out for too long will constantly compete with the bass pattern. Listen to the kick on its own, at the track’s tempo, before adding anything else: a kick that sounds fine at a slower reference tempo can behave differently once repeating every half-second at 138 BPM, with the tail of one hit bleeding into the transient of the next.
The bass pattern needs to be built in direct relationship to the kick, not written in isolation and fitted in afterward — usually by shaping its amplitude envelope so it ducks or steps out of the way rhythmically where the kick lands, whether through manual envelope shaping, a gate, or sidechain compression routed from the kick channel. Cubase’s stock compressor handles this well; the specific plugin matters far less than getting the timing and depth of the ducking to actually match the groove rather than applying a generic preset. A fast attack and a release tuned to the gaps between kick hits usually separates a bass that pumps musically from one that just sounds squashed.
It’s also worth treating the bass rhythmically as its own instrument rather than a static drone reinforcing the root note. A rolling pattern with occasional variation — a held note across a bar, a passing note between root and fifth — gives it a groove of its own that the kick can lock into, though the more movement you introduce, the more carefully the kick’s transient and the bass’s attack need to be arranged so they don’t collide on the same subdivisions.
Low-frequency clutter is the other recurring problem. Keep anything below roughly 100–120 Hz strictly mono and limited to the kick and sub-bass, using Cubase’s Channel EQ to roll off unnecessary low content from pads and chords. Checking the mix in mono periodically — a one-click toggle in Cubase’s mixer — exposes phase issues between kick and bass early, before they’re buried under everything added on top. It also helps to check that relationship against even a rough version of the chords or pad as soon as one exists, since low end that feels balanced against silence can shift once a wide chord layer with its own low-mid content enters.
Because the kick and bass define how a track feels throughout its full length, test that foundation across a full arrangement sketch rather than a looped intro bar — a relationship that works over four bars can start to feel monotonous over three or four minutes without variation. A small fill or rhythmic change every sixteen or thirty-two bars is often enough to keep it from feeling mechanical without undermining the consistency the rest of the track depends on.
Create the Main Chord Progression
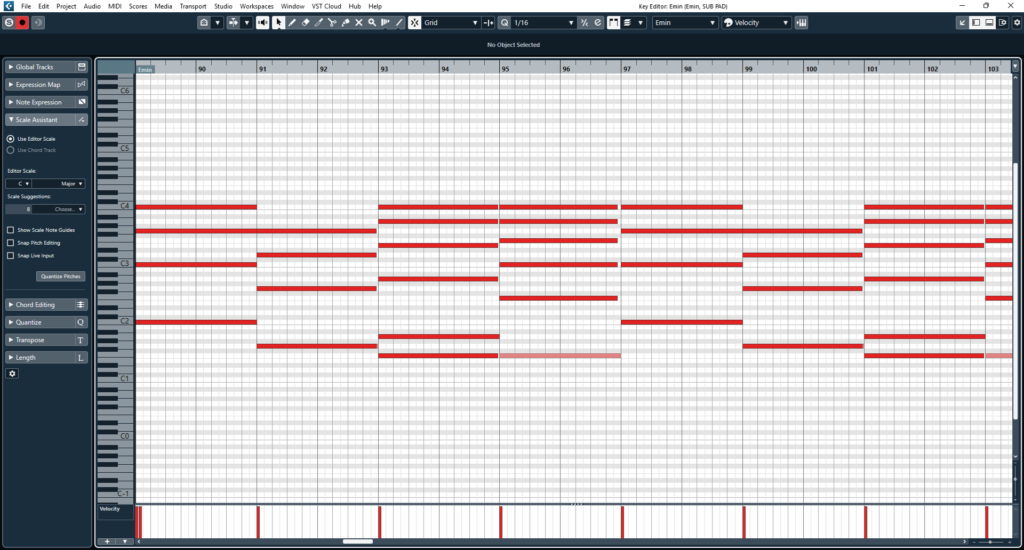
Chords are where uplifting trance earns its emotional character, and they’re worth writing before the melody, not after. A progression that moves between a minor tonic and its relative major, using inversions to keep the bass movement smooth rather than jumping around, tends to produce the kind of lift the genre relies on — but the specific progression matters less than understanding what each chord is doing emotionally in context. A suspended chord held before resolving to a major triad creates anticipation; a chord voiced with the fifth in the bass rather than the root creates a different, more unresolved feeling than a root-position voicing of the same chord. Chord progressions are vey important when learning how to make uplifting trance with Cubase.
Voice leading between chords — how individual notes move from one chord to the next — is worth paying attention to, rather than just picking chord shapes that sound correct against the key. If the top note of one chord jumps a large interval to reach the top note of the next, the progression can feel disjointed even if the chords are theoretically sound. Keeping the smallest possible movement between shared or neighbouring tones from chord to chord tends to produce a smoother, more connected progression, and it also makes the progression easier to write a melody against later, since the melody can lean on those same connecting tones.
Extended and suspended chords are worth using deliberately rather than as decoration — a ninth can soften a resolution and make it feel wistful, a suspended second or fourth held before resolving creates the held-breath quality a lot of breakdowns rely on. It’s easy to overuse these, though: a progression where every chord carries an extension loses the contrast that makes an extension meaningful, so it’s usually more effective to keep most of the progression in simple triads and reserve a suspension for the moment you want to draw attention to.
Cubase’s piano roll is genuinely useful here beyond simply entering notes — sketching a progression as block chords, then experimenting with inversions by dragging individual notes up or down an octave, lets you hear how the same harmonic movement feels with different voicings without re-entering anything. Try the progression both as sustained pads and as a rhythmic pluck pattern early on, because a voicing that works beautifully held for four beats can sound cluttered as a fast sixteenth-note pattern, simply because the ear doesn’t have time to resolve a dense chord at that speed — thinning it out or spreading it across a wider register usually solves this without changing the underlying harmony.
Repetition is not a weakness here — most uplifting trance progressions repeat for long stretches — but the movement itself needs enough harmonic interest that it doesn’t need melodic distraction to stay engaging, since the melody hasn’t been written yet. Listen to the progression on repeat longer than feels necessary, because a sequence that sounds satisfying after one pass can reveal a flat quality after the fourth or fifth loop, which is roughly how long it will actually play in the finished arrangement.
Write the Main Melody
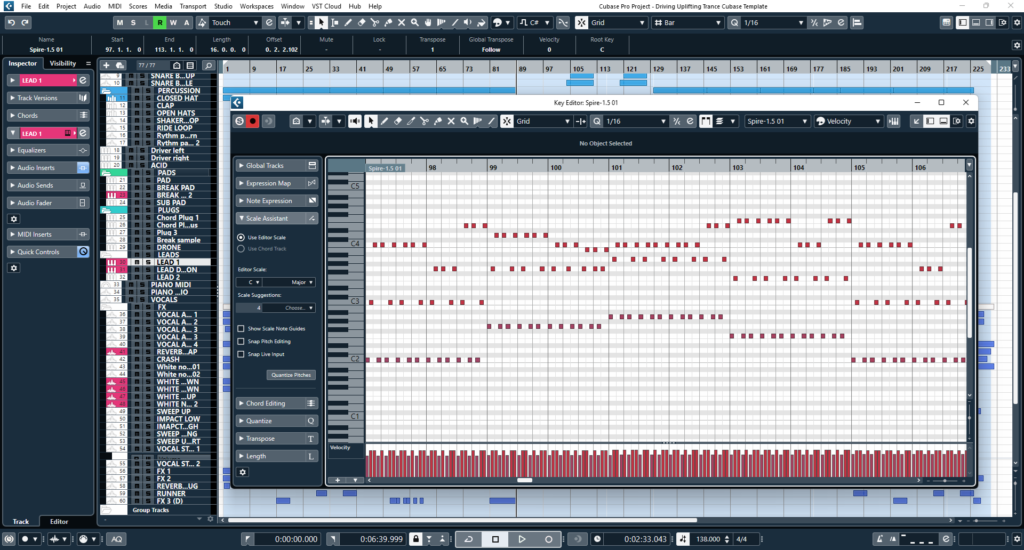
The most common mistake at this stage is writing a melody with far more notes than the underlying harmony can support, which usually happens because the chords feel too static on their own and the instinct is to fill that space melodically rather than return to strengthen the harmony. A strong uplifting trance melody usually starts from a short motif — four to eight notes — repeated with small variations rather than continuously extended into new material. That repetition with variation is what makes a melody memorable on a second or third listen, as opposed to a constantly shifting line that never establishes anything to hold onto.
A useful way to develop that motif is to think in terms of call and response rather than one continuous phrase. A short opening idea — the call — followed by a related second phrase that answers it, often ending on a different note or resolving in a different direction, creates a sense of musical conversation that a single unbroken line doesn’t, and naturally leaves space between the two phrases for the chords underneath to be heard.
Octave movement is worth using deliberately rather than by accident. A phrase that jumps up an octave partway through — reintroducing the same motif but higher — is one of the more reliable ways to create a sense of lift without changing the notes themselves, and it’s especially effective the second or third time a melody appears, since the listener already knows the original version and the shift reads as an escalation. Used too often it loses impact quickly, so it’s worth reserving for a specific moment — often the final drop.
Building the melody so it develops across the track, rather than staying identical every time it appears, matters as much as the initial motif. A simpler, more restrained version early on — fewer notes, longer note values, more space — followed by a fuller or more ornamented version later, means the melody’s return during the final drop feels like a payoff rather than a repeat. A supporting melody, played by a second instrument sitting below or above the main line, can reinforce that development without competing, provided it stays subordinate — moving mostly in longer note values and avoiding the lead’s register and rhythmic density, so the two lines don’t blur together.
Leaving space between phrases — actual silence, not just a held note — gives the melody room to breathe and gives the chords a moment to be heard clearly. Check the melody against the chords specifically for moments where a melodic note clashes uncomfortably against the harmony — not every clash is a problem, since passing dissonance can add tension deliberately, but an unintentional clash on a long, exposed note usually needs adjusting.
In Cubase, working the melody out with quantisation set loose enough to allow some natural timing variation, rather than snapping everything rigidly to the grid, usually produces a more musical result — perfectly quantised lines in this genre often sound mechanical in a way that undercuts the emotional intent. Velocity is worth shaping deliberately too, since uniform velocity across every note reads as flat regardless of how strong the line is. It’s also worth checking how the melody sits once other elements are in place — a melody that felt appropriately dense against just the chords can feel overcrowded once plucks and arps compete in a similar register, and thinning the melody, not the accompaniment, is usually the right fix.
Build the Breakdown
A breakdown that’s just the kick and bass dropping out isn’t really a breakdown — it’s a mute. The section needs its own musical content that develops the emotional idea the chords and melody have already established, usually meaning the chord progression brought forward more prominently, often in a different voicing, alongside a pad or atmospheric layer filling the space the kick and bass have vacated. Piano or pluck elements playing a simplified version of the melody are common here, giving the listener something familiar to hold onto during a section that’s otherwise texturally different.
Reverb and space do real work here specifically because there’s more room for them without competing against a full mix — a send with a longer decay than you’d use elsewhere, applied to pads and melodic elements, helps create the sense of the track opening up. Filter movement on a pad, slowly opening across the breakdown, is a reliable way to build gradual tension without adding new elements or volume. If the track uses vocal elements, this is usually where they carry the most weight, since a vocal phrase has room to be heard clearly against a sparser arrangement.
It’s worth thinking about the breakdown as having its own internal shape rather than a single static mood held for sixteen or thirty-two bars. One that opens quietly, develops through a middle section where the pluck line and pad build in intensity, and arrives at a clear peak just before the build-up begins gives the section its own sense of arrival — often the natural place for the main melody to return in a fuller form, since the listener has had space to actually miss it. Timing that peak matters too: too early leaves the remaining bars marking time, while never arriving at one can feel like building toward something that never happens.
The breakdown’s job, ultimately, is to prepare the listener emotionally for what’s coming — the return of the main melody is often the moment that makes the eventual drop land, because the listener has already been given the melodic idea they’re now waiting to hear again at full strength.
Arrange the Full Track
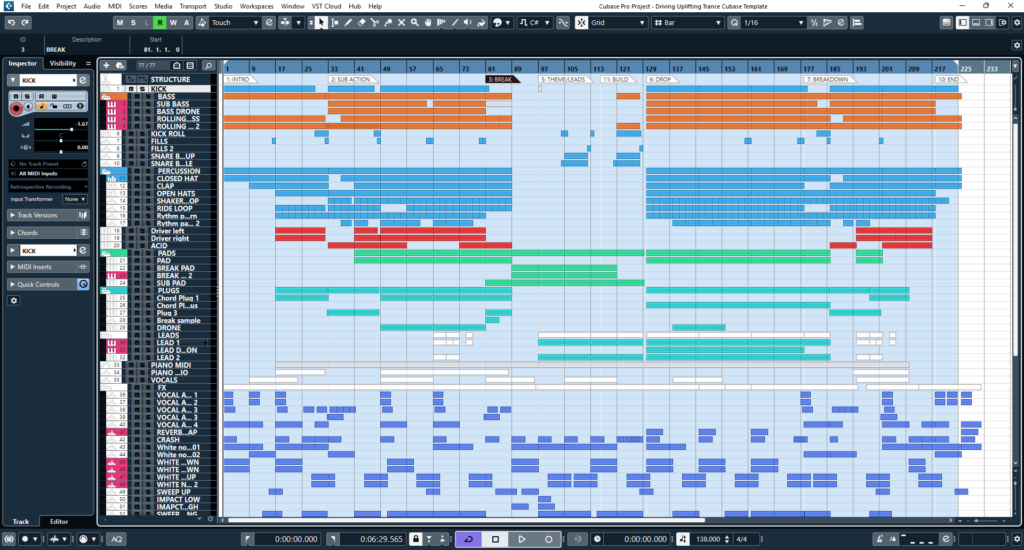
There’s no single correct arrangement template for uplifting trance, but most functional versions share a similar shape: an intro establishing groove without full energy, an early section introducing the main melodic material at reduced intensity, a breakdown developing the emotional core, a build-up creating anticipation, a first drop at full energy, often a second breakdown or a varied repeat of the drop, a final drop typically carrying the most developed version of the melody, and an outro that winds down rather than stopping abruptly.
What matters more than the shape itself is making sure each repeated section is different enough from the last that the arrangement feels like it’s progressing rather than looping. Thinking about energy as a curve across the full track, rather than sections with a fixed intensity, helps — it’s more useful as a wave: climbing through the first build, peaking at the first drop, easing back for the second breakdown, and climbing again toward a final drop that matches or slightly exceeds the first. A track where every section sits at roughly the same energy, even a high one, tends to feel flatter than one with genuine peaks and valleys.
Elements entering and leaving the arrangement should follow that logic rather than being present only for their assigned section. A pad that first appears under the breakdown can carry through into the early part of the first drop before dropping out, giving the transition continuity rather than a hard cut. A pluck introduced in the build-up doesn’t need to vanish the moment the drop lands — thinning it out or moving it up an octave so it sits above the reintroduced kick and bass keeps a thread running through the transition rather than resetting the texture at every boundary.
Making a second drop feel different from the first, without abandoning what made it work, usually comes down to small deliberate changes: a different chord voicing under the same progression, a melody extended or ornamented compared to its first appearance, a supporting layer that wasn’t there before, or a different order in which elements enter — the kick and bass returning a bar before the melody, say, rather than everything landing at once. It’s also worth removing something the second time, not just adding — an arrangement that only accumulates layers eventually runs out of headroom, while one that also occasionally simplifies feels more considered.
The risk of a track sounding like the same eight-bar loop repeated throughout usually comes from writing the core loop first and extending it by simple repetition without revisiting the material at each stage. Treat every four, eight, or sixteen-bar block as an opportunity for a small change — a filter opening slightly further, a percussion element dropping out for two bars — rather than duplicating wholesale. Cubase’s Arranger Track is genuinely useful for testing structural decisions before committing, defining sections as arranger events and reordering them non-destructively to hear whether a second breakdown is actually necessary; duplicating a track folder is only the starting point, since the variation work still has to happen afterward.
Want to see these techniques in a complete Cubase project?
Instead of studying individual synths in isolation, you can explore complete Trance productions with the instruments, bass, drums, effects and arrangement already working together.
Explore our Trance Cubase Templates →
Make the Drop Feel Bigger
A drop feels powerful because of what happens right before it, not because of how loud it is in isolation. Stripping elements away in the final bars — removing a layer at a time, cutting to just a filtered kick, or dropping to near silence for a beat — creates the contrast that makes the returning arrangement feel like an event. The length of that stripped-back moment matters more than producers often credit — a full bar of silence reads very differently from a beat or two, and it’s worth trying several lengths against the same drop to find what lands without feeling like a mistake.
When the drop lands, the kick and bass need to return with the same clarity and weight they had earlier, which sometimes means resisting the urge to stack additional low-end layers just because the section is meant to feel bigger — a busier mix at the point of maximum energy is often where clarity actually degrades. Staggering exactly what returns and when, rather than bringing everything back on the same downbeat — kick and bass landing first, full melody arriving a bar later — can make a drop feel like it’s unfolding rather than simply switching on.
Bringing the main melody back at the right moment, generally right at or shortly after the drop hits, is usually what makes the section feel emotionally resolved rather than just loud. Supporting layers are worth adding carefully and one at a time, checking after each addition whether it’s actually improving the section or just filling space. It’s a useful habit to solo the drop against the breakdown that precedes it periodically, and ask whether it feels different enough in energy and density from what came before, rather than judging the drop against itself in isolation.
Use Transitions and Automation
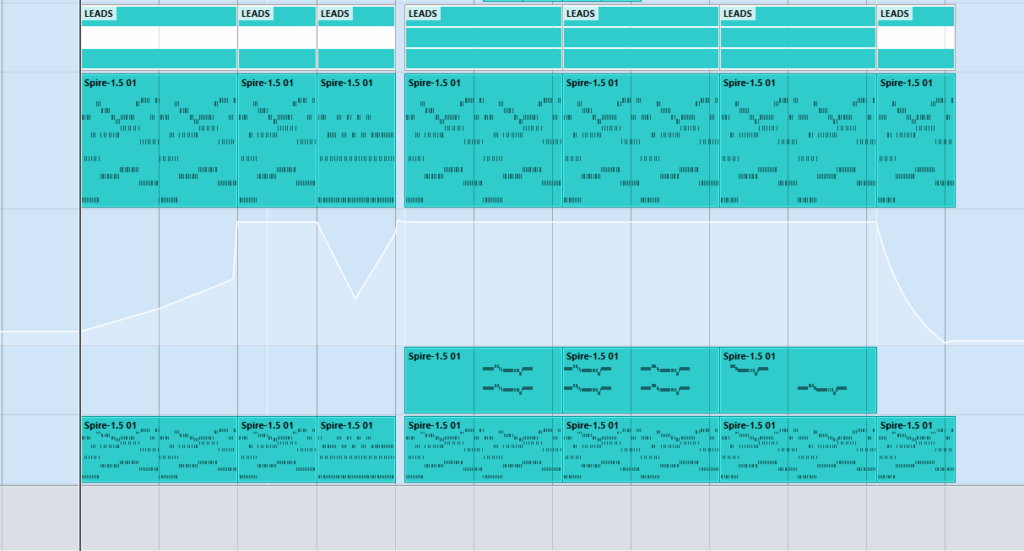
Automation in this genre exists to support the arrangement’s movement, not to decorate individual moments. A filter cutoff sweep automated across a build-up, opening a pad or lead progressively, communicates the same rising tension the arrangement is already building toward, and works because it reinforces something the listener is already feeling. Shaping that automation with a curve rather than a straight linear ramp usually helps — a sweep that accelerates toward the end of the build tends to land with more impact right where the drop needs it, since the perceived rate of change matters more than the literal, evenly-spaced movement of the parameter.
Reverb and delay send automation — increasing sends into a breakdown, pulling them back sharply at the drop — is one of the more effective ways to reinforce the contrast between spacious and driving sections without changing the underlying sounds. A higher send during the breakdown supports the sense of space, while an abrupt reduction as the drop lands helps the same sounds feel tighter and more immediate — the same patch serving two different roles depending on how much signal is reaching a long reverb at any given moment. Stereo width automation is worth a smaller mention: narrowing a pad slightly before a drop, then widening it again once it lands, subtly reinforces the same release.
Noise sweeps, reversed sounds, and short impacts are useful specifically at structural boundaries, and lose their effect quickly if used at every transition rather than reserved for the ones that matter most. The same applies to drum fills leading into a new section — one that appears identically before every transition stops registering as a transition and starts reading as a habit. It’s worth varying not just whether a fill is present, but what kind, so the ear isn’t anticipating the exact same cue every time.
Cubase’s automation lanes make all of this straightforward to draw once the arrangement decisions are made, but automation should be the last layer applied to a transition that’s already working structurally, not a substitute for one that isn’t quite landing. If a transition still feels weak after automation, it’s usually worth going back to the arrangement itself rather than adding more movement on top of a structural problem.
Mixing Uplifting Trance in Cubase
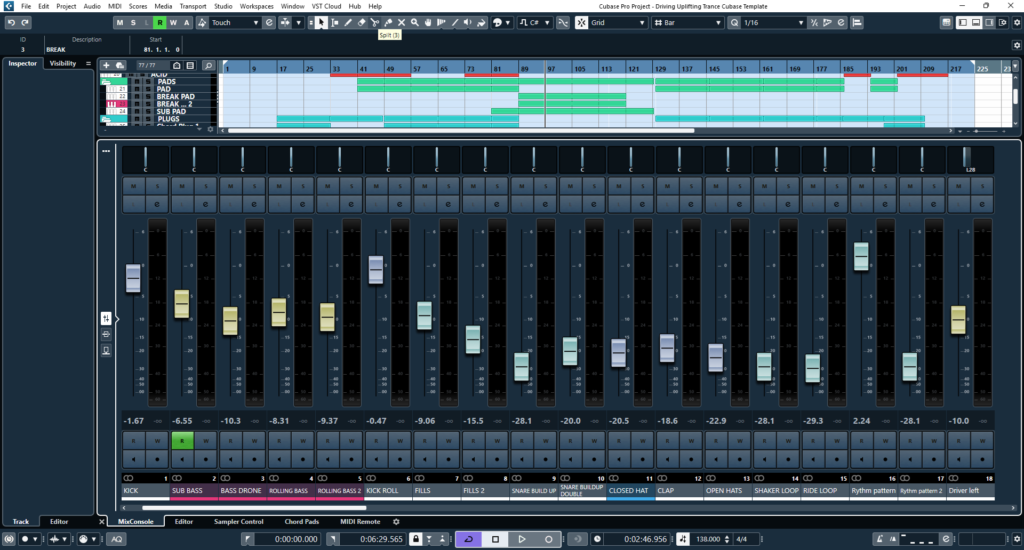
The mixing priorities for this genre follow directly from what the arrangement is trying to achieve: clarity in a dense mix, and enough dynamic contrast between sections that the drop still feels like the loudest, most energetic point even though the overall loudness range across a modern master is fairly narrow. Kick and bass balance is the foundation, and it’s worth returning to that relationship during mixing rather than assuming it’s settled — sidechain settings, EQ carving, and levels often need adjusting once the full arrangement is playing, since a sidechain depth that felt right against nothing else can suddenly feel too aggressive or too subtle once pads, chords, and a lead are reacting to the same rhythmic pulse.
Midrange clarity is where a lot of these mixes lose definition, because leads, plucks, chords, and vocal elements are often all competing in a similar frequency range. It helps to think of each as needing its own primary zone rather than all occupying the same space at full volume — the lead wants clear presence in the upper-mid to high range, chords and pads sit slightly below that, and a vocal, if present, needs the most deliberate carving of space around it. Cubase’s Channel EQ used to carve complementary space — cutting rather than boosting where possible — tends to produce a clearer result than making every element louder, and a small cut in the chords exactly where the lead sits is often more effective than boosting the lead and risking harshness.
Wide sounds need active management rather than blanket widening: a pad or supersaw lead benefits from width, but it needs to collapse cleanly in mono, worth checking directly in Cubase’s mixer. Be deliberate about which elements are allowed to be wide and which stay centred — if the pad, lead, and a secondary pluck are all maximally wide at once, the stereo field can feel diffuse rather than spacious, whereas keeping the bass, kick, and main rhythmic pluck closer to centre while reserving the widest treatment for pads and sustained leads gives the mix a clearer sense of depth, with wide elements reading as atmosphere around a focused, centred core.
Reverb and delay, already used compositionally in the breakdown and transitions, need a final check during mixing to make sure they’re not building into mud once everything is playing at once — a reverb that sounded spacious on a solo pad can become a wash of noise once several other elements are sending into it too. Listening to the combined return of all sends soloed as a group at the busiest point often reveals problems hard to spot in the full mix, such as a buildup of low-mid energy that a high-pass filter on the return channel usually resolves.
Brightness and harshness in the lead and pluck sounds are common in this genre, since the bright, wide, detuned character that makes them work also makes them prone to harshness in the upper midrange; a targeted EQ cut in that range, rather than a broad brightness reduction, usually resolves it without losing the character. Check the lead against the chords and pad together rather than solo, since a lead that sounds manageable in isolation can become genuinely harsh once stacked against a wide chord layer occupying a similar register.
Each element — kick, bass, chords, pads, lead, and vocal if present — needs evaluating not just for how it sounds individually but for how its combined level and frequency content behaves at the busiest point in the track, usually the final drop, since that’s where the most layers are active. Build the mix balance around that moment and then check that earlier, sparser sections still sit correctly relative to it. Check at different playback levels and on different systems, since a mix balanced at loud volume can reveal a buried melody at lower, more realistic levels, and use reference tracks for relative balance rather than chasing an exact loudness match.
Common Mistakes When Making Uplifting Trance
When learning how to make uplifting trance with Cubase, most recurring problems in this genre trace back to skipping or rushing one of the earlier stages rather than to any single production mistake. Writing a melody before the chord progression is settled is a common one, because it locks the melody into a harmonic context that then has to be worked around, usually resulting in a melody and harmony that technically fit together but don’t reinforce each other emotionally. Overloading the arrangement with layers, particularly in the drop, tends to happen because a section feels like it needs more energy and the instinct is to add another sound rather than create that energy through contrast and arrangement decisions instead.
Making every section similarly loud and dense is a related problem — if the breakdown and the drop occupy a similar dynamic and textural space, the arrangement has no contrast left to work with. An overlong breakdown is a specific version of this same issue: one that outstays the tension it’s building leaves the listener waiting for a release that keeps getting delayed. Excessive reverb, particularly stacked across multiple elements without checking the cumulative effect, is one of the more common ways a mix loses clarity in this genre specifically.
Relying on presets without reshaping them is easy to miss because the preset might sound fine in isolation — the problem shows up once it’s sitting in a full arrangement where a filter cutoff or send level that was fine on its own isn’t suited to how the sound needs to function within the specific track. And a drop that’s loud without being emotionally effective is usually the clearest sign that something earlier in the process — the chords, the melody, the breakdown, the build-up — wasn’t doing its job, because volume and layering can’t manufacture the anticipation that a well-built arrangement creates on its own.
Ready to Build Your Next Trance Track?
Take what you've learned from this guide and explore complete Cubase projects built for Trance production. Study the sounds, bass, drums, effects and arrangement — and use the projects as a starting point for your own music.
Explore Trance Cubase Templates →Final Thoughts
None of this replaces the part that actually can’t be templated: the chord progression that feels genuinely emotional to you, the melodic idea worth developing across an entire track, the arrangement decisions that come from listening critically to what a section actually needs. Cubase’s tools — the piano roll, the Arranger Track, automation lanes, the mixer — are there to let those musical decisions happen efficiently, not to generate them. Uplifting trance that works comes from a clear musical idea carried through a controlled arrangement with real contrast and emotional development, built with enough attention at each stage that nothing is left to compensate for something skipped earlier.
Want to see these techniques in a complete Cubase project?
Download and explore Uplifting trance Cubase templates at our store
Also see our guide for Best VST plugins for Trance music: